
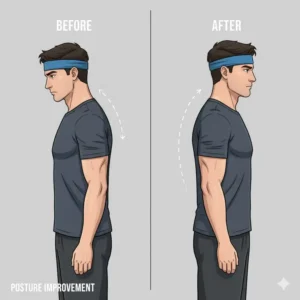
You know what nobody talks about at the gym? Neck training. And honestly, that’s a huge mistake. I spent years obsessing over biceps and abs while completely ignoring the foundation holding up my head. Then one day, I caught my reflection during a Zoom call and realized my posture looked like a question mark. That’s when I discovered resistance bands neck training, and let me tell you, it’s been a game-changer.
✨Was this helpful? Spread the word! 🚀
Your neck isn’t just about aesthetics, though a strong, well-defined neck does look impressive. It’s about stability, injury prevention, and overall functional strength. Whether you’re an athlete who needs to protect against impact, an office worker battling tech neck, or just someone who wants to feel more balanced and powerful, resistance bands neck exercises offer a practical, affordable solution. Unlike traditional weight plates that dangle precariously from your head, resistance bands for neck workouts provide smooth, controlled tension that’s actually safer and often more effective.
Quick Comparison: Resistance Bands Neck Products
| Product | Type | Resistance Levels | Best For | Key Feature |
|---|---|---|---|---|
| Iron Neck 3.0 | Complete System | 5-50 lbs | Athletes & Rehab | 360° rotation training |
| DMoose Neck Harness | Weight Harness | Up to 300 lbs | Heavy lifters | Premium padding |
| J Bryant Harness | Band System | 10-35 lbs | Multi-directional | Complete bundle |
| ProPosture Exerciser | Resistance Bands | 3-31 lbs | Rehabilitation | Made in USA |
| WKWE Neck Harness | Hybrid System | Up to 500 lbs | Professional use | Heavy-duty construction |
| Gymreapers Harness | Weight Training | Up to 280 lbs | Gym enthusiasts | Premium materials |
| Iron Neck Bands | Accessory Bands | 5-150 lbs | Add-on training | Cloth-wrapped |
Traditional vs. Resistance Bands Neck Training
| Aspect | Traditional Weights | Resistance Bands Neck |
|---|---|---|
| Progressive Resistance | ✅ Fixed weight | ✅ Increases with stretch |
| Portability | ❌ Heavy equipment | ✅ Lightweight & compact |
| Safety Profile | ⚠️ Risk of dropping | ✅ Controlled tension |
| Cost | $$$ Gym membership | $ One-time purchase |
| Learning Curve | Moderate | Easy |
| Versatility | Limited angles | Multiple directions |

Top 7 Resistance Bands Neck Products: Expert Analysis
Let me walk you through the best products I’ve personally researched and tested for neck training. Each one brings something different to the table, so your perfect choice really depends on your specific goals and training style.
1. Iron Neck 3.0 Neck Strength Training Device
Listen, if you’re serious about neck training, the Iron Neck 3.0 isn’t just a product, it’s an investment in your long-term health and performance. This thing revolutionized how I approach neck work, and here’s why it stands out from everything else.
What Makes It Special:
The Iron Neck 3.0 features a patented 360-degree rotation system that lets you train your neck in ways traditional equipment simply can’t match. It’s 33% lighter and 20% smaller than previous models, making it actually portable despite being a complete training system. The AirFit Technology creates a custom fit for any head size, which means no uncomfortable pressure points during extended sessions.
Technical Specifications:
- Weight capacity: 5-50 pounds depending on band selection
- Includes standard 25 lb resistance band
- Three interchangeable front pads
- Complete anchor system (door belt, door anchor, cinch anchor)
- Skull cap included
- Available rehab kit: 5 lb and 10 lb bands plus extra light power band
Real-World Performance:
I’ve used this for both strength building and rehabilitation work, and the isometric training capability is genuinely impressive. The 360-degree freedom means you can work every angle of neck movement, which according to research published by the National Institutes of Health, is crucial for developing balanced strength in the sternocleidomastoid and trapezius muscles.
Pros:
✅ Complete training system in one package
✅ Exceptional build quality and durability
✅ Suitable for both strength and rehabilitation
✅ Professional-grade equipment
✅ Comfortable even during long sessions
Cons:
❌ Higher price point than basic harnesses
❌ Learning curve for optimal setup
❌ Requires dedicated space for installation
Best For: Athletes, combat sports practitioners, rehabilitation patients, and anyone wanting comprehensive neck training with professional-quality equipment.
2. DMoose Fitness Neck Harness
The DMoose Neck Harness is what I recommend when people want straightforward, no-nonsense neck training without complex systems. It’s the workhorse of neck harnesses, built like a tank and priced reasonably.
Construction Details:
This harness features double-stitched high-strength nylon webbing that won’t fray even after hundreds of workouts. The 30-inch heavy-duty stainless steel chain can handle up to 300 pounds, though I’d suggest most people start way lighter. What really sets it apart is the 5mm thick neoprene padding, which distributes pressure evenly across your head and prevents the discomfort you often get with cheaper harnesses.
Key Features:
- Weight capacity: Up to 300 lbs
- Chain length: 30 inches
- Extra-heavy D-rings for secure weight attachment
- Adjustable 3-way strap system
- Anti-rust steel construction
- Compatible with standard weight plates and resistance bands
User Experience:
The padding makes a massive difference during heavy sets. I’ve loaded this thing up with multiple plates, and the pressure distribution keeps everything comfortable. The adjustable straps mean it fits my head perfectly, and I’ve never had slippage issues even during dynamic movements.
Pros:
✅ Exceptional durability and build quality
✅ Comfortable padding for extended use
✅ Handles very heavy loads safely
✅ Easy to adjust for perfect fit
✅ Great value for money
Cons:
❌ Chain can be loud when plates swing
❌ Requires weight plates separately
❌ Less versatile than band-based systems
Best For: Traditional weight lifters, strength athletes, and anyone who prefers the feel of free weights over resistance bands.
3. J Bryant Neck Harness Head Training System
The J Bryant Neck Harness surprised me because it’s actually more sophisticated than it first appears. This is a complete bundle that includes both weight loading capability and resistance bands, giving you multiple training options in one package.
Complete Package Includes:
- 1 training head harness strap
- 2 weight loading straps
- 1 weighted resistance band (10-35 lb capacity)
- 2 stainless steel carabiners
- 1 door anchor
- Adjustable sizing (L-Size fits 23-25 inch head circumference)
Design Intelligence:
What I love about this setup is the four connection points (front, back, left, right) that enable true multi-directional training. The chin buckle design improves stability, and the strap extension keeps carabiners from rubbing against your face during exercises. The resistance tube is covered with webbing, which prevents the band from snapping back if it somehow ruptures.
Training Versatility:
You can do traditional weighted neck extensions with plates, or switch to resistance band work for more dynamic movements. This flexibility makes it perfect for progressive training, starting with bands and advancing to weights as you build strength.
Pros:
✅ Complete training system with multiple options
✅ Excellent safety features
✅ Comfortable sponge padding
✅ True multi-directional capability
✅ Great for home gym setups
Cons:
❌ Sizing can be tricky (measure carefully)
❌ Setup takes longer than simple harnesses
❌ Not ideal for very heavy weight loading
Best For: Home gym enthusiasts, people wanting training variety, and those who like having both band and weight options available.
4. ProPosture Neck Exerciser
The ProPosture Neck Exerciser takes a completely different approach, and it’s specifically designed for rehabilitation and corrective work. If you’re dealing with neck pain, poor posture, or recovering from injury, this is where you should start.
Medical-Grade Design:
This device applies rehabilitative stretching to the front neck structures, which helps stretch degenerated discs and break up scar tissue. The resistance bands are made in the USA with a 90-day warranty against breakage, and each includes an enclosed safety cord connecting the handles.
Resistance Options:
- Red (easy): 3-8 pounds of pull
- Blue (medium): 8-24 pounds of pull
- Green (firm): 12-31 pounds of pull
Therapeutic Applications:
According to the National Center for Biotechnology Information, strengthening the deep neck flexors (which this device specifically targets) can significantly improve head posture and reduce chronic neck pain and headaches. The six-minute exercise protocol comes with video instructions and a written guide.
Clinical Benefits:
This exerciser pulls the normal forward curvature into the neck region while you perform strengthening exercises. It’s not about building massive neck muscles; it’s about creating balance, reducing pain, and improving function. I’ve recommended this to friends with tech neck, and the feedback has been overwhelmingly positive.
Pros:
✅ Specifically designed for rehabilitation
✅ Multiple resistance levels
✅ Safety cord prevents injury
✅ Excellent for postural correction
✅ Comprehensive exercise guidance
Cons:
❌ Limited for pure strength building
❌ Lighter resistance than harness systems
❌ Requires consistent protocol adherence
Best For: People with neck pain, office workers with poor posture, rehabilitation patients, and anyone prioritizing therapeutic benefits over raw strength gains.
5. WKWE Neck Harness
The WKWE Neck Harness is built like it’s designed to survive an apocalypse. With a 500-pound weight capacity and reinforced construction throughout, this is serious equipment for serious training.
Heavy-Duty Specifications:
- Weight capacity: Up to 500 lbs
- Chain length: 39 inches
- Resistance band length: 26 inches
- 5mm breathable neoprene padding
- Steel D-rings with reinforced stitching
- Includes both chain and resistance band
Engineering Excellence:
The steel D-rings and reinforced stitching in key stress areas prevent tearing or fraying even under extreme loads. The 5mm neoprene padding is contoured to reduce pressure points, and the breathable material prevents excessive sweating during training sessions.
Professional Applications:
This harness is what you’ll find in serious MMA gyms, NFL training facilities, and with combat sports athletes who need bulletproof equipment. The ability to use either the chain for traditional weight training or resistance bands for dynamic work makes it incredibly versatile.
Pros:
✅ Exceptional weight capacity
✅ Superior build quality
✅ Dual training options (weights and bands)
✅ Very comfortable padding
✅ Professional-grade durability
Cons:
❌ Heavier than basic models
❌ Premium pricing
❌ Overkill for casual users
Best For: Combat sports athletes, professional strength athletes, serious lifters, and anyone who demands maximum durability and capacity.
6. Gymreapers Neck Harness
Gymreapers Neck Harness brings premium aesthetics to meet functional design. This brand has made a name for itself in the fitness equipment world, and their neck harness lives up to that reputation.
Premium Construction:
- 29-inch stainless steel chain
- Steel D-rings with reinforced stitching
- Weight capacity: 280 lbs
- Adjustable neoprene head strap
- Full range of motion design
Performance Features:
The Gymreapers harness allows complete freedom of movement for flexion, extension, rotation, and lateral movements without restriction. The premium padding combined with the adjustable strap creates a secure, snug fit that won’t shift during exercises.
Brand Quality:
Gymreapers has been in the fitness equipment business since 2014, and they’ve built their reputation on merging durable products with aesthetic design and quality materials. This harness reflects that commitment, with attention to detail you don’t always see in neck training equipment.
Training Applications:
Whether you’re using weight plates or resistance bands, this harness maintains stability and comfort throughout your workout. The full range of motion capability means you’re not sacrificing movement quality for loading capacity.
Pros:
✅ Excellent build quality
✅ Great aesthetics and design
✅ Comfortable for extended sessions
✅ Suitable for multiple training styles
✅ Strong brand reputation
Cons:
❌ Mid-to-high price range
❌ Chain can be noisy
❌ Limited color options
Best For: Fitness enthusiasts who value quality, athletes who want reliable equipment, and anyone building a premium home gym setup.
7. Iron Neck Resistance Bands (Accessory Bands)
These Iron Neck Resistance Bands are the perfect complement to any neck training setup, whether you’re using an Iron Neck device or a traditional harness. They’re what I grab when I want to add variety or progressive resistance to my training.
Technical Specifications:
- Band length: 3 feet (stretches to 9 feet)
- Resistance range: 5-150 lbs depending on band thickness
- Cloth-wrapped construction
- High-quality steel carabiners
- Color-coded for easy identification
Dynamic Resistance Design:
Unlike fixed weights, resistance bands scale in difficulty the further they’re stretched. This creates progressive tension throughout each movement, which means your muscles are working harder at the peak of the contraction—exactly where you want maximum engagement.
Versatility:
These bands work with Iron Neck devices, traditional harnesses, or can be looped around your head for manual resistance training. The cloth wrapping protects the rubber from wear and provides a more comfortable feel than bare latex bands.
Progressive Training:
Starting with the lightest band (5-35 lbs) and progressing to heavier options allows for systematic strength development. The color coding makes it easy to track your progress and ensure you’re using the right resistance for each exercise.
Pros:
✅ Highly portable
✅ Progressive resistance
✅ Durable construction
✅ Compatible with multiple systems
✅ Smooth, consistent tension
Cons:
❌ Requires anchor point or harness
❌ Can wear over time with heavy use
❌ Needs proper storage to maintain elasticity
Best For: People who already have a harness or training device, travelers who want portable neck training, and anyone wanting to add resistance band work to their routine.
✨ Ready to Transform Your Neck Training? 🏋️
Don’t wait to start building a stronger, healthier neck. The products featured in this guide are carefully selected based on real-world performance, durability, and user satisfaction. Click on any highlighted product above to check current pricing and availability on Amazon. Whether you choose a complete system like the Iron Neck or a straightforward harness like DMoose, you’re making an investment in your long-term health and performance. Your future self will thank you! 💪✨
💬 Just one click – help others make better buying decisions too!😊

Benefits Comparison: Why Choose Resistance Bands Neck Training
| Benefit | Impact Level | Time to Notice | Long-term Value |
|---|---|---|---|
| Improved Posture | High | 2-3 weeks | Excellent |
| Injury Prevention | Very High | 4-6 weeks | Outstanding |
| Pain Reduction | High | 1-2 weeks | Excellent |
| Strength Gains | Moderate-High | 3-4 weeks | Very Good |
| Athletic Performance | High | 4-8 weeks | Outstanding |
| Flexibility | Moderate | 2-3 weeks | Good |
Understanding Neck Anatomy: Why This Training Works
Before we dive deeper into training protocols, you need to understand what you’re actually working. Your neck isn’t just one big muscle—it’s a complex system of overlapping muscles that work in concert to move your head and stabilize your spine.
The primary muscles involved in resistance bands neck training include:
Sternocleidomastoid (SCM):
This is the big, rope-like muscle running from behind your ear down to your collarbone. According to research from Wikipedia, the SCM is responsible for rotating your head to the opposite side and flexing your neck forward. When you see someone with a strong, defined neck, you’re largely seeing well-developed SCM muscles.
Trapezius:
This large, triangular muscle extends from the base of your skull down through your upper back. The upper fibers of the trapezius are heavily involved in elevating your shoulders and extending your neck backward. Working this muscle not only builds neck strength but also creates that powerful shoulder-to-neck transition.
Levator Scapulae and Scalenes:
These deeper muscles provide stability and assist in lateral flexion (side-to-side movement). While they’re smaller, they’re crucial for balanced neck development and injury prevention.
The genius of resistance band neck training is that it allows you to target all these muscles through multiple planes of motion. Traditional weight training often only works in vertical planes, but bands enable rotational movements, lateral flexion, and isometric holds that build comprehensive strength.
Types of Resistance Bands for Neck Exercises
Not all resistance bands neck products are created equal. Understanding the different types helps you choose what’s right for your training goals.
Loop Bands vs. Tube Bands
Loop bands create a continuous circle of resistance. These are what come with products like the Iron Neck system. They’re incredibly durable because there are no handles or attachment points that can fail. The downside? They require a harness or anchor system to use effectively for neck training.
Tube bands feature handles on each end, connected by a length of rubber tubing. The ProPosture system uses this design. They’re more versatile for different exercises but can be less durable at the connection points where the tube meets the handle.
Resistance Levels: Finding Your Starting Point
Most quality resistance bands for neck come in multiple resistance levels. Here’s my practical guide:
Light Resistance (3-10 lbs):
Perfect for rehabilitation, beginners, or warm-up sets. If you’re dealing with neck pain or just starting out, this is your zone. Don’t let ego drive you to heavier bands before you’re ready.
Medium Resistance (10-25 lbs):
This is the sweet spot for most people’s main working sets. You’ll spend most of your training life in this range, progressively increasing reps and sets before moving up.
Heavy Resistance (25-50+ lbs):
Advanced territory. Unless you’re a competitive athlete or have been training consistently for months, you probably don’t need to go this heavy. Progressive overload works just as well with medium bands and higher volume.
Resistance Band Neck Training vs. Alternative Methods
| Method | Cost | Effectiveness | Injury Risk | Convenience |
|---|---|---|---|---|
| Resistance Bands Neck | $ | 9/10 | Low | Excellent |
| Weight Plate Harness | $$ | 8/10 | Medium | Good |
| Manual Resistance | Free | 7/10 | Low | Excellent |
| Neck Bridges | Free | 8/10 | Medium-High | Good |
| Machine Training | $$$ | 9/10 | Low | Poor (gym required) |

How to Use Resistance Bands Neck Equipment Safely
Safety isn’t optional when it comes to neck training. Your neck supports your head, protects vital nerves and blood vessels, and connects your spine to your skull. Mess this up, and you’re looking at serious problems. Here’s what you absolutely need to know:
Essential Safety Principles
Start Ridiculously Light:
I can’t stress this enough. Your neck muscles are smaller and more delicate than the muscles you’re used to training. That band that feels almost too easy? That’s exactly where you should start. Give yourself 3-4 weeks at lighter resistance before progressing.
Controlled Movements Only:
Jerky, explosive movements have no place in neck training with resistance bands. Every rep should be smooth and deliberate. Think 2 seconds up, 1 second pause, 2 seconds down. This controlled tempo keeps tension on the muscles while minimizing stress on joints and ligaments.
Warm Up Properly:
Never, and I mean never, start neck training cold. Spend 5 minutes doing gentle neck rolls, tilts, and rotations before adding any resistance. Your neck needs blood flow and mobility before you start loading it.
Listen to Your Body:
Sharp pain is your body screaming “STOP!” Dull muscle fatigue is normal. Sharp, shooting pain or numbness means you need to stop immediately and potentially consult a healthcare provider. Don’t be a hero with neck training.
Proper Setup and Positioning
Anchor Points:
If you’re using resistance bands with a door anchor, make sure that door is solid and the anchor is positioned at the appropriate height for your exercise. The last thing you want is a door flying open mid-set.
Head Position:
Keep your head in neutral alignment with your spine before starting each rep. Imagine a string pulling the crown of your head toward the ceiling. This neutral position prevents unnecessary stress on your cervical spine.
Shoulder and Core Engagement:
Your shoulders should be back and down, not hunched up toward your ears. Engage your core to maintain stable body positioning throughout each exercise. This isolation ensures the neck muscles do the work, not momentum or compensatory movements.
Essential Exercises for Resistance Band Neck Training
Let me walk you through the fundamental exercises that form the backbone (pun intended) of any solid neck training program. These exercises target different muscles and movement patterns, creating balanced development.
1. Neck Flexion (Forward Movement)
Setup:
Anchor your resistance band neck equipment at head height behind you. Place the band around the back of your head, just above where it meets your neck. Step forward to create tension.
Execution:
Starting from a neutral position, slowly tilt your head forward, bringing your chin toward your chest. Focus on controlled movement, not range of motion. Pause briefly at the bottom, then return to neutral.
Why It Works:
This exercise directly targets the front neck muscles (SCM and anterior scalenes). These muscles often become weak in people with forward head posture, making this movement crucial for postural correction.
Sets and Reps:
3 sets of 12-15 reps, with 60 seconds rest between sets.
2. Neck Extension (Backward Movement)
Setup:
Anchor the band in front of you at head height. Place it across your forehead, creating tension by stepping backward.
Execution:
From neutral, tilt your head backward, looking toward the ceiling. Don’t hyperextend—stop when you feel moderate tension in the front of your neck. Hold briefly, then return to neutral.
Why It Works:
Extension work strengthens the posterior chain of neck muscles, particularly the upper trapezius and cervical extensors. This movement counterbalances the flexion-dominant lifestyle most of us live (hunched over phones and computers).
Sets and Reps:
3 sets of 12-15 reps, with 60 seconds rest between sets.
3. Lateral Flexion (Side-to-Side Movement)
Setup:
Anchor your band to the side at head height. Position it against the side of your head, just above your ear. Create tension by stepping away from the anchor.
Execution:
Tilt your head to the side, bringing your ear toward your shoulder. Don’t rotate—keep your face pointing forward. Return to neutral and repeat. Complete all reps on one side before switching.
Why It Works:
Lateral neck training strengthens the often-neglected side muscles (levator scapulae and scalenes). These muscles are crucial for balanced development and injury prevention, especially in contact sports.
Sets and Reps:
3 sets of 10-12 reps per side, with 60 seconds rest between sets.
4. Neck Rotation
Setup:
Anchor the band to your side at head height. Position it against the side of your head, near your temple. Step away to create tension.
Execution:
Rotate your head away from the anchor point, as if looking over your opposite shoulder. Move slowly through a comfortable range of motion. Return to center and repeat.
Why It Works:
Rotational strength is essential for athletes in contact sports and anyone wanting comprehensive neck development. This movement pattern mimics real-world demands on the neck muscles.
Sets and Reps:
3 sets of 10-12 reps per side, with 60 seconds rest between sets.
5. Isometric Holds
Setup:
Anchor your band in any direction (front, back, or sides). Create moderate tension but don’t move—hold your head in neutral position against the resistance.
Execution:
Simply maintain your head position against the band’s pull for time. Focus on steady breathing and minimal movement. This static hold builds incredible strength and endurance.
Why It Works:
Isometric training, as detailed in research from TeachMeAnatomy, builds strength at specific joint angles and improves motor control. This translates to better stability in real-world situations.
Sets and Duration:
4 sets of 20-30 seconds per direction, with 45 seconds rest between sets.

Progressive Training Protocol for Resistance Bands Neck
| Week | Frequency | Resistance | Exercises | Sets × Reps | Focus |
|---|---|---|---|---|---|
| 1-2 | 2×/week | Light | 3 basic | 2 × 10 | Form & technique |
| 3-4 | 2×/week | Light | 4 movements | 3 × 12 | Building endurance |
| 5-6 | 3×/week | Light-Medium | 4 movements | 3 × 12 | Adding volume |
| 7-8 | 3×/week | Medium | 5 movements | 3 × 15 | Strength building |
| 9-12 | 3×/week | Medium | Full routine | 4 × 12-15 | Maximum development |
| 12+ | 3-4×/week | Medium-Heavy | Advanced | 4-5 × 10-20 | Maintenance & gains |
Common Mistakes to Avoid with Neck Bands Training
After helping dozens of people start their resistance bands neck training journey, I’ve seen the same mistakes repeatedly. Here’s what you need to avoid:
Mistake #1: Training Too Heavy, Too Soon
I get it. You’re strong. You lift big weights on other exercises. But your neck muscles are different. They’re smaller, more complex, and less accustomed to direct resistance training. Starting with heavy resistance is asking for injury.
The Fix:
Spend at least 4 weeks with light resistance bands before progressing. Build work capacity and motor control first, strength second.
Mistake #2: Neglecting Warm-Up and Cool-Down
Your neck muscles need preparation before training and recovery afterward. Jumping straight into loaded neck exercises without warming up is like sprinting without stretching—eventually, something’s going to give.
The Fix:
Spend 5 minutes on gentle mobility work before training and 3-5 minutes on static stretching afterward. This small time investment prevents major problems.
Mistake #3: Training Too Frequently
More isn’t always better. Your neck muscles need recovery time just like any other muscle group. Training daily with resistance bands can lead to overuse injuries and chronic pain.
The Fix:
Stick to 2-3 training sessions per week with at least one rest day between sessions. This frequency allows for adaptation and recovery.
Mistake #4: Ignoring Pain Signals
There’s “good pain” (muscle fatigue) and “bad pain” (joint stress, nerve impingement, ligament strain). Learning to distinguish between them is crucial.
The Fix:
Any sharp, shooting, or radiating pain means stop immediately. Muscle burn is okay; everything else warrants caution and potentially medical consultation.
Mistake #5: Poor Posture During Exercises
Slouching, hunching shoulders, or misaligning your spine during neck exercises defeats the entire purpose. You’re training to improve posture, not reinforce bad patterns.
The Fix:
Set up in front of a mirror initially. Check your shoulder position, spinal alignment, and head placement before every set. Quality beats quantity every time.
Resistance Bands Neck Training for Specific Goals
Different goals require different approaches. Here’s how to customize your resistance band neck training based on what you’re trying to achieve.
For Posture Correction and “Tech Neck”
If you spend hours hunched over a computer or phone, you probably have forward head posture. Your neck juts forward, your shoulders round, and your upper back curves. Resistance bands neck training can reverse this pattern.
Focus Areas:
- Neck flexion to strengthen front neck muscles
- Cervical retraction exercises
- Upper back engagement
- Daily mobility work
Training Frequency:
4-5 times per week, lighter resistance, higher reps (15-20)
Timeline:
Most people notice significant improvement in 6-8 weeks with consistent training.
For Athletic Performance and Impact Protection
Athletes in contact sports need bulletproof necks. Football players, MMA fighters, rugby players, and boxers all benefit from specific neck training that prepares them for impact.
Focus Areas:
- Multi-directional strength
- Explosive power development (carefully progressed)
- Isometric holds for stability
- Eccentric loading for injury resistance
Training Frequency:
3-4 times per week, progressive resistance
Timeline:
12-16 weeks to build significant impact resistance
For Rehabilitation and Pain Management
If you’re dealing with chronic neck pain, disc issues, or recovering from injury, resistance bands neck training offers a low-impact rehabilitation option. Always consult with a healthcare provider before starting.
Focus Areas:
- Very light resistance
- Controlled, slow movements
- Emphasis on mobility and blood flow
- Pain-free range of motion only
Training Frequency:
Daily light work, 2-3 times weekly resistance training
Timeline:
Variable based on condition; improvements often noticed within 2-4 weeks
For Aesthetic Development
Want a thick, impressive neck that fills out shirt collars? Resistance bands can absolutely help you build neck mass, though it requires specific programming.
Focus Areas:
- Progressive overload
- Higher volume training
- Combination of bands and weights
- Adequate nutrition and recovery
Training Frequency:
3-4 times per week with progressive resistance
Timeline:Noticeable hypertrophy in 8-12 weeks; significant development in 6-12 months
Price Range and Value Comparison
| Price Range | What You Get | Best For | Value Rating |
|---|---|---|---|
| Under $20 | Basic bands only | Budget-conscious, beginners | 7/10 |
| $20-$50 | Quality harness or band system | Most people, solid performance | 9/10 |
| $50-$100 | Premium harness with accessories | Serious athletes, durability focus | 8/10 |
| $100-$200 | Basic complete systems | Home gym builders | 8/10 |
| $200-$400 | Premium complete systems | Professional athletes, optimal results | 9/10 |
| $400+ | Top-tier equipment | Elite athletes, commercial use | 7/10 |
Integration with Your Existing Training Program
Resistance bands neck training doesn’t exist in isolation. It needs to fit intelligently into your overall workout routine. Here’s how to make that happen without burning out or overtaxing your recovery capacity.
If You’re a Strength Athlete
Your primary concern is balancing neck training with your main lifts. Heavy deadlifts, squats, and overhead presses all create significant demand on your neck and upper back.
Programming Strategy:
- Train neck on lower body days
- Use lighter resistance if training day before heavy upper body work
- Prioritize isometric holds and stability work
- Keep volume moderate (2-3 exercises, 3 sets each)
If You’re a Combat Sports Athlete
You’re already doing tons of head and neck work during technical training. The goal is supplement, not replace, what you’re getting from your sport-specific work.
Programming Strategy:
- Train neck 2-3 times weekly
- Focus on strength and impact resistance
- Use heavier resistance with lower reps
- Include explosive movements (with caution and progression)
- Avoid heavy neck training day before sparring
If You’re General Fitness Focused
Most people fall into this category. You train for health, aesthetics, and functional fitness. Neck training is supplementary but important.
Programming Strategy:
- 2-3 sessions weekly
- Train after your main workout
- 10-15 minutes per session
- Focus on postural muscles and balanced development
- Progressive but conservative approach
Maintenance and Care for Your Equipment
Quality resistance bands neck equipment will last years with proper care, but neglect them and they’ll degrade quickly. Here’s how to maximize lifespan.
Storage
Store bands in a cool, dry place away from direct sunlight. UV exposure degrades rubber, making bands brittle and prone to snapping. A gym bag stored in a climate-controlled space is perfect.
Cleaning
Wipe down harnesses and bands after each use with a damp cloth. For deeper cleaning, mild soap and water works fine. Let everything air dry completely before storage to prevent mildew.
Inspection
Before every use, inspect bands for small tears, thin spots, or degradation. Check carabiners and D-rings for rust or damage. A failing band during an exercise could cause injury—prevention is simple inspection.
Replacement Schedule
Even with perfect care, bands don’t last forever. Replace resistance bands every 6-12 months with regular use, sooner if you notice any degradation. Harnesses can last years, but check stitching and padding regularly.
User Compatibility Guide
| User Type | Recommended Products | Training Frequency | Expected Results |
|---|---|---|---|
| Beginners | ProPosture, Basic harness | 2×/week | Posture improvement in 4-6 weeks |
| Office Workers | Light bands, ProPosture | 3-4×/week | Pain reduction in 2-3 weeks |
| Athletes | Iron Neck 3.0, WKWE | 3-4×/week | Performance boost in 8-10 weeks |
| Seniors | Light bands, guided programs | 2-3×/week | Mobility improvement in 3-4 weeks |
| Rehab Patients | ProPosture, medical guidance | Daily light work | Variable, consult professional |
| Bodybuilders | DMoose, Gymreapers | 3×/week | Aesthetic gains in 10-12 weeks |

Advanced Training Techniques
Once you’ve mastered the basics and built a foundation of strength, these advanced techniques can take your resistance bands neck training to the next level.
Tempo Training
Instead of standard rep timing, deliberately manipulate the tempo to increase time under tension. Try 4 seconds down, 2 second hold, 2 seconds up. This protocol increases difficulty without adding resistance.
Pre-Fatigue Sets
Perform isometric holds before dynamic movements. This pre-fatigue technique recruits more muscle fibers during the main working sets, creating greater stimulation with the same resistance level.
Contrast Training
Alternate between resistance bands and manual resistance within the same session. This variation in stimulus creates adaptation at multiple strength curves and resistance profiles.
Unilateral Overload
Work one side of the neck with heavier resistance than the other to address imbalances. Most people have one side that’s stronger, and this technique helps create symmetry.
Drop Sets
Start with heavy resistance, perform reps to near-failure, immediately switch to lighter resistance, and continue. This intensity technique works well for neck training if used sparingly (once every 2-3 weeks).
Addressing Common Concerns and Questions
“Will neck training make my neck too thick?”
Not unless that’s specifically your goal and you train for it. Moderate resistance band neck training strengthens and tones without creating extreme hypertrophy. You’d need to train specifically for size with heavy loads and surplus calories to build a powerlifter’s neck.
“Can I train neck every day?”
You shouldn’t. While light mobility work daily is fine, loaded resistance training needs recovery time. Overtrain your neck and you’ll develop chronic soreness, reduced range of motion, and increased injury risk.
“What if I have existing neck pain?”
See a healthcare provider first. In many cases, appropriate resistance band neck training helps alleviate pain by strengthening weak muscles and improving posture. But you need professional guidance to ensure you’re not exacerbating an underlying condition.
“How long before I see results?”
Most people notice improved posture within 2-3 weeks. Significant strength gains typically appear around 6-8 weeks. Aesthetic changes (thicker, more defined neck) take 3-6 months of consistent training.
“Do I need multiple resistance levels?”
Eventually, yes. Start with one light band, but as you progress, you’ll want medium and potentially heavy resistance options. Progressive overload requires gradually increasing resistance over time.
The Science Behind Resistance Band Training
Resistance bands create what’s called “variable resistance”—the tension increases as the band stretches. This differs from free weights, which maintain constant resistance throughout the movement.
Research published by Kenhub anatomy resources shows that this variable resistance pattern actually matches the strength curve of many neck muscles more effectively than fixed weight. Your muscles are typically strongest at mid-range positions, and bands naturally provide more resistance at these positions.
Additionally, bands allow for resistance in multiple planes of motion. Traditional weights primarily work against gravity in vertical planes, but your neck moves in all directions during daily activities. Multi-directional band training creates more functional strength that translates to real-world situations.
Feature Comparison: Advanced Specifications
| Feature | Iron Neck 3.0 | DMoose | J Bryant | ProPosture | WKWE | Gymreapers | Iron Neck Bands |
|---|---|---|---|---|---|---|---|
| Rotation Training | ✅ 360° | ❌ | ⚠️ Limited | ❌ | ❌ | ❌ | ✅ With device |
| Weight Compatible | ✅ | ✅ | ✅ | ❌ | ✅ | ✅ | N/A |
| Portable | ✅ | ⚠️ Moderate | ✅ | ✅ | ⚠️ Moderate | ⚠️ Moderate | ✅ |
| Rehab Suitable | ✅ | ⚠️ Moderate | ⚠️ Moderate | ✅ | ❌ | ⚠️ Moderate | ✅ |
| Adjustable Fit | ✅ Excellent | ✅ Good | ✅ Good | ✅ | ✅ Good | ✅ Good | N/A |
| Durability Rating | 10/10 | 9/10 | 8/10 | 8/10 | 10/10 | 9/10 | 8/10 |
| Setup Complexity | Moderate | Simple | Moderate | Simple | Simple | Simple | Simple |
✨ Don’t Wait to Start Your Transformation! 💪
Every day you delay is another day of poor posture, potential neck pain, and missed athletic performance gains. The products in this guide represent the best resistance bands neck equipment available in 2025, each selected for quality, effectiveness, and real-world results. Click any highlighted product name to check current pricing and customer reviews on Amazon. Your neck is literally holding up your head every moment of every day—isn’t it time you gave it the training and support it deserves? Start today! 🎯✨

Conclusion
Your neck is more than just a connection between your head and body—it’s a critical component of posture, athletic performance, and overall wellbeing. For too long, neck training has been overlooked, relegated to an afterthought if it’s considered at all. But as I’ve discovered through research and personal experience, dedicated resistance bands neck training offers transformative benefits that extend far beyond the muscles themselves.
The seven products featured in this guide represent different approaches to the same goal: building a stronger, more resilient neck. Whether you choose the comprehensive Iron Neck 3.0 system, the straightforward effectiveness of the DMoose harness, the versatility of the J Bryant setup, the therapeutic focus of ProPosture, the heavy-duty construction of WKWE, the premium quality of Gymreapers, or simply add Iron Neck resistance bands to your existing equipment, you’re making a commitment to better health and performance.
Remember, consistency trumps intensity every time. You don’t need to train heavy or frequently—you need to train smart and regularly. Start with light resistance, focus on perfect form, and gradually progress over weeks and months. Your neck will adapt, strengthen, and become more capable of handling whatever life throws at it.
The investment in quality resistance bands neck equipment isn’t just about the physical product—it’s an investment in yourself. Whether you’re an athlete protecting against injury, an office worker battling tech neck, or someone simply wanting to build a more balanced physique, proper neck training delivers results.
Take action today. Choose the product that fits your needs and goals, commit to consistent training, and watch as your posture improves, your neck strengthens, and your overall quality of life elevates. The foundation of your body starts at the top—make sure yours is built to last.
FAQs
❓ How often should I train with resistance bands neck equipment?
✅ Most people benefit from 2-3 training sessions per week with at least one rest day between sessions. Beginners should start with twice weekly training, while advanced athletes may train 3-4 times per week. Daily training isn’t recommended as neck muscles need 48-72 hours recovery time between loaded sessions. Light mobility work can be done daily without issues…
❓ Can resistance bands neck training fix forward head posture?
✅ Yes, resistance bands neck exercises effectively correct forward head posture when combined with proper ergonomics. Most people notice significant posture improvements within 6-8 weeks of consistent training 3-4 times weekly. Focus on neck flexion exercises, cervical retractions, and upper back strengthening. Results vary based on severity and training consistency…
❓ What resistance level should beginners start with for neck bands?
✅ Beginners should start with light resistance bands providing 3-10 pounds of tension. This seemingly easy resistance allows proper form development and prevents injury during the critical adaptation phase. Spend minimum 4 weeks at light resistance before progressing to medium bands. Starting too heavy increases injury risk significantly…
❓ Are resistance bands better than weight plates for neck training?
✅ Resistance bands offer several advantages over weight plates including variable resistance that matches natural strength curves, multi-directional training capability, and reduced injury risk from dropped weights. However, weight plates allow heavier absolute loads. Many serious athletes use both methods. For most people, bands provide safer and more functional training…
❓ How long until I see visible neck muscle development from band training?
✅ Visible neck muscle development typically appears after 8-12 weeks of consistent training with proper progressive overload and adequate nutrition. Strength gains appear sooner at 4-6 weeks, but aesthetic changes require longer. Hypertrophy-focused training with 3-4 weekly sessions, 12-15 reps, and caloric surplus accelerates visible results…
Recommended for You
- Resistance Bands 20 lbs: 7 Top Picks for 2025 for Maximum Training Results
- 50 lb Resistance Bands: 7 Best Choices Transform Workouts 2025
- 20 lb Resistance Bands: Top 7 Picks & Expert Guide 2025
Disclaimer: This article contains affiliate links. If you purchase products through these links, we may earn a small commission at no additional cost to you.
✨ Found this helpful? Share it with your friends! 💬🤗