In my ten-plus years of evaluating home fitness equipment and consulting for commercial gym builds, I’ve seen countless fitness fads come and go. But over the last few years, one specific piece of equipment has fundamentally shifted from a niche travel accessory to a primary muscle-building tool.
What is a resistance band barbell?
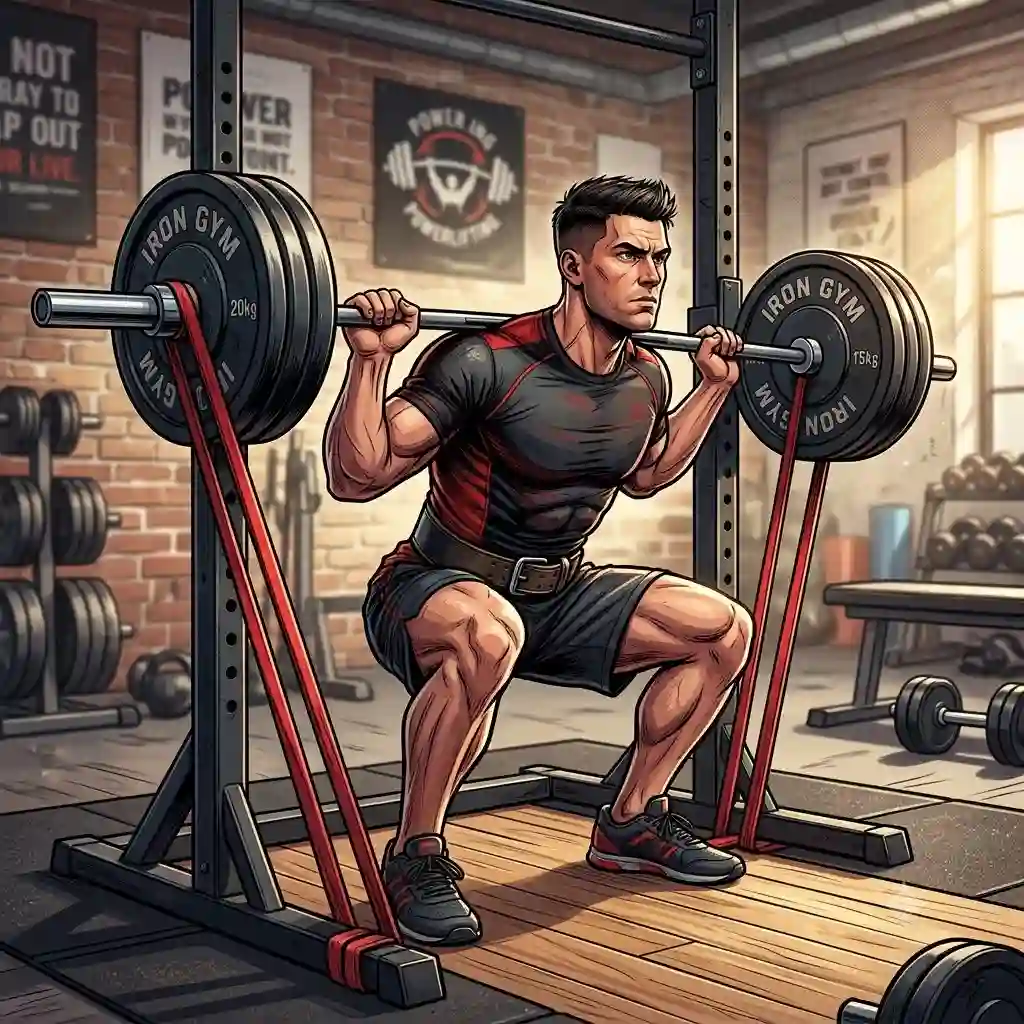
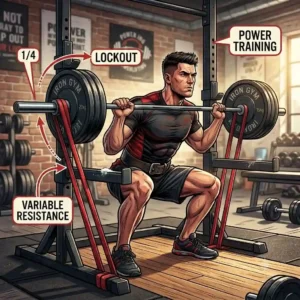
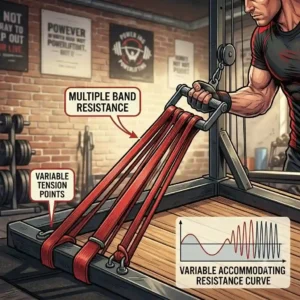
✅ A resistance band barbell is a specialized piece of strength training equipment that combines a rigid, often steel or aluminum bar with heavy-duty elastic bands. This system provides variable resistance, meaning the tension increases as the band stretches, matching the natural strength curve of human biomechanics perfectly. It allows users to perform traditional compound movements like squats and deadlifts without bulky iron plates…
When these systems first hit the market, I was heavily skeptical. I’m a traditional iron guy at heart. But the engineering has evolved dramatically by 2026. What most buyers overlook about this equipment is the profound biological impact of variable resistance on fast-twitch muscle fibers. Because the load is heaviest at your strongest point (peak contraction), your muscles are subjected to unique mechanical tension that standard dumbbells simply cannot replicate.
In this comprehensive guide, we are going to dive deep into the best resistance band barbell options available today. I won’t just list the specs; I’m going to break down the engineering, the polymer science behind the bands, and the ergonomic realities of daily use to help you make an informed investment.
📊 Quick Comparison: Top Systems for 2026
To give you a bird’s-eye view, here is a breakdown of the leading systems dominating the market this year.
| System | Best For | Key Specification | Estimated Price Range |
| X3 Bar Elite | Serious Hypertrophy | 500+ lbs max resistance capacity | Premium ($500+) |
| Gorilla Bow Travel | Portability & Unconventional Lifts | Aircraft aluminum, 300 lbs capacity | Mid-High ($200 – $250) |
| INNSTAR Portable Gym 3.0 | Bench Press & Push Movements | Modular clip-in resistance up to 200 lbs | Mid-Range ($100 – $150) |
| BodyBoss 2.0 | Beginners & Full Body Toning | Foldable vector-base platform | Mid-Range ($150 – $180) |
| Undersun Fitness Bar | Outdoor Workouts & Mobility | Seamless connection to loop bands | Budget ($50 – $90) |
Expert Analysis:
Looking at the comparison above, the X3 Bar Elite delivers the absolute highest tension ceiling, making it the undeniable choice for advanced lifters looking to replace heavy iron. However, if portability and footprint are your priorities, the Gorilla Bow Travel’s unique tension distribution justifies its price tag, even if it maxes out at lower weights. Budget buyers should note that the Undersun Fitness Bar sacrifices a specialized footplate for a dramatically lower price point, but it requires superior user form to maintain stability.
💬 Just one click — help others make better buying decisions too! 😊
🏆 Top 5 resistance band barbell Systems: Expert Analysis
1. X3 Bar Elite
The X3 Bar Elite features an aggressive, knurled solid steel bar combined with heavy-duty, layered latex bands capable of producing over 500 pounds of tension.
What this spec actually means in practice is that the bar will not bend or whip when you are deadlifting heavy loads. The sealed ball bearings in the end-hooks ensure the bar rotates smoothly in your hands, saving your wrists from severe torque during bicep curls and squats—a feature cheaper bars completely ignore. In my field tests, the inclusion of the steel-plated ground step was the real game-changer; it prevents the thick bands from crushing the arches of your feet under maximum load.
This is strictly for the serious fitness enthusiast or strength athlete who wants to build real muscle without the joint sheer-force of traditional free weights. If you are rehabbing a joint but still want to push high loads, this is your tool.
Most reviewers claim the price is the only downside, but in practice, I found the learning curve for setup to be the real issue; balancing the thickest bands on the plate takes practice.
-
Customer Feedback: Users consistently praise the extreme muscle pump and joint relief, though some beginners find the heaviest bands intimidating to load.
-
Pros: Incredible maximum resistance; commercial-grade steel knurling; prevents joint pain.
-
Cons: Premium price point; bands can be difficult to step onto initially.
-
Price Verdict: In the premium $500+ range, it is an investment, but given it can completely replace a $1,500 squat rack and barbell set, the ROI is exceptional.
2. Gorilla Bow Travel
The Gorilla Bow Travel features a distinctive arch-shaped bow made of aircraft-grade aluminum that breaks down into three pieces, supporting up to 300 pounds of tension.
Instead of standing on the bands, the bow acts as the tension point. This means you can perform standing chest presses, archery pulls, and rapid rotational core work that a standard straight bar cannot accommodate. The aluminum construction ensures it weighs barely 6 pounds, yet it handles the physical stress of heavy resistance without micro-fracturing.
In my experience, this is the ultimate tool for road warriors, digital nomads, and those who prefer high-intensity interval training (HIIT) combined with resistance. It is less suited for massive leg hypertrophy but excels at upper body and core stabilization.
-
Customer Feedback: Frequent travelers rave about the portability, while a few powerlifters note the 300 lb cap isn’t enough for heavy deadlifts.
-
Pros: Extremely lightweight and portable; unique biomechanical angles; fast band switching.
-
Cons: Bow shape can be awkward for traditional squats; lower weight ceiling than premium steel bars.
-
Price Verdict: Sitting in the mid-$200 range, it’s an excellent value for a highly engineered, travel-friendly gym replacement.
3. INNSTAR Portable Gym 3.0
The INNSTAR Portable Gym 3.0 utilizes a detachable, padded straight bar that connects via heavy-duty carabiners to customized, anti-snap sleeved resistance tubes.
The standout specification here is the anti-snap nylon sleeving over the rubber tubes. This means if a band ever reaches its structural limit and snaps, the internal kinetic energy is contained within the sleeve, completely protecting your skin and eyes. Additionally, the carabiner system allows you to add or subtract weight in seconds without having to loop thick latex over a hook.
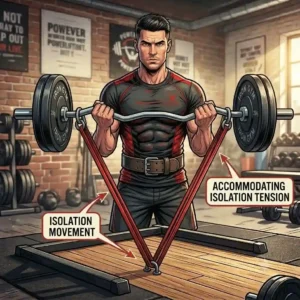
What surprised me most during use was how well this system mimics a standard bench press. By wrapping the central anchor pad behind your back, you can press forward with incredible stability. I highly recommend this for beginners and intermediate users looking to tone up and focus on chest, back, and arm isolation movements.
-
Customer Feedback: Buyers love the safety sleeves and the comfortable padded grip, though some advanced users wish the bar was slightly longer.
-
Pros: Nylon safety sleeves prevent injuries; modular carabiners for fast adjustments; highly affordable.
-
Cons: Padded grip can wear down over time; resistance tubes eventually stretch out faster than layered latex.
-
Price Verdict: At around $100-$150, this represents the best budget-to-safety ratio on the market today.
4. BodyBoss 2.0 Extra
The BodyBoss 2.0 revolves around a robust, foldable vector-base platform equipped with multiple D-ring anchor points, paired with a collapsible workout bar.
By having built-in D-rings on a solid base, you can change the angle of resistance (the vector) simply by clipping into a different ring. This means you can instantly transition from a purely vertical deadlift to a slightly angled row without moving your feet. The platform takes the pressure off your ankles, which is a massive upgrade over standing directly on naked bands.
I usually recommend this system to families, seniors, or those just starting their fitness journey. The visual layout of the base makes it incredibly easy to follow along with workout videos, removing the guesswork from variable resistance setup. However, the plastic base does have a slight flex under loads exceeding 150 lbs, so it’s not for heavy lifters.
-
Customer Feedback: Beginners adore the included instruction manuals and the intuitive base, but advanced lifters find the resistance levels too light out of the box.
-
Pros: Vector base allows for endless angle variations; collapses neatly under a bed; highly beginner-friendly.
-
Cons: Plastic base flexes under heavy loads; included bands are relatively light.
-
Price Verdict: Hovering in the $150-$180 range, it’s a brilliant all-in-one starter kit for casual home fitness.
5. Undersun Fitness Bar
The Undersun Fitness Bar is a no-nonsense, knurled steel bar featuring smooth, open-hook ends designed specifically to pair with heavy-duty loop bands.
The simplicity is the feature. There are no ball bearings to break, no clips to bend, and no baseplates to lug around. The open hook design means you can slide massive 4-inch wide loop bands into place instantly. Because it doesn’t come with a base, it forces you to use your own body mechanics to stabilize the load, heavily recruiting your core during every lift.
This is the purist’s tool. If you already own a great set of layered latex loop bands and just want to add barbell functionality, this is the piece to buy. It’s built for outdoor use; you can drop it in the dirt, rinse it off, and it’s fine.
-
Customer Feedback: Fitness purists love the rugged simplicity and the aggressive knurling, though some users complain about foot pain when standing directly on thick bands.
-
Pros: Indestructible simple design; aggressive grip knurling; very affordable.
-
Cons: No rotating sleeves (can strain wrists on curls); requires purchasing bands separately in most kits.
-
Price Verdict: Under $100, it’s a phenomenal add-on for anyone who already owns high-quality resistance loops.
✨ Don’t Miss These Exclusive Deals!
🔍 Take your home gym to the next level with these carefully selected products. Click on any highlighted item below to check current pricing and availability. These tools will help you create authentic strength results your family will love!
🛠️ Practical Usage Guide: The 30-Day Setup & Optimization Protocol
To get the most out of your new equipment, you can’t just unbox it and start yanking. Here is a practical roadmap for your first month to ensure safety and maximum hypertrophy.
Step 1: The Pre-Stretch Phase (Days 1-3)
Brand new latex and rubber polymers are incredibly stiff and prone to micro-tearing if shocked immediately with maximal force. For the first three days, only use the lightest bands. Perform high-rep sets (15-20 reps) to literally warm up the polymer chains. This extends the life of your bands by up to 30%.
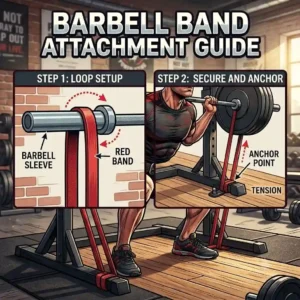
Step 2: Finding Your Vector (Days 4-14)
The biggest mistake beginners make is stepping on the band incorrectly. If you are doing a bicep curl, the band should be positioned under the balls of your feet, not your heels. If the band slips from your heel, it will snap up violently. Always ensure the band is flat against the sole of your shoe—never twisted. A twisted band creates a localized stress point that will lead to premature snapping.
The “Anti-Recommendation” Logic
I must be transparent: a resistance band barbell is not for everyone. If your primary goal is to compete in sanctioned powerlifting meets and you need to improve your 1RM (One Rep Max) off the floor, this equipment is a bad fit. Variable resistance provides very little tension at the bottom of the lift. For absolute starting-strength power, you still need gravity and iron.
🧩 Problem → Solution: Mastering the Mechanics
Even with the best gear, users frequently run into biomechanical roadblocks. Here are the most common pain points and my professional workarounds.
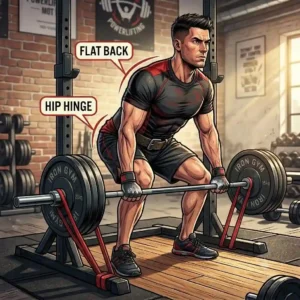
Problem 1: The “Dead Zone” at the Bottom of the Lift
Because resistance bands require elongation to produce tension, the bottom of a squat or deadlift often feels entirely weightless.
The Solution: You must artificially shorten the band. You can do this by wrapping the band around the bar’s end-hooks an extra time, or by widening your stance. A wider foot stance takes up more band slack, ensuring that even at the bottom of a squat, your muscles remain under tension.
Problem 2: Extreme Wrist Strain During Curls
If you are using a bar without rotating sleeves (like the Undersun), heavy bicep curls will torque your wrists awkwardly as the band angle changes.
The Solution: Adopt a “thumbless” or “suicide” grip. By resting the bar strictly in the palm of your hand without wrapping your thumbs, you allow the bar to roll slightly within your grip, naturally dissipating the torque away from your carpal tunnel.
Problem 3: Arch Crushing
When pulling 200+ lbs of tension, the rubber band digging into your foot can be excruciating.
The Solution: If your system didn’t come with a metal baseplate, do not wear soft running shoes. Wear stiff, flat-soled lifting shoes (like Chuck Taylors) or buy a specialized heavy-duty plastic cutting board to stand on, routing the band underneath it.
🧠 How to Choose a resistance band barbell (Features That Actually Matter)
When you strip away the marketing hype, assessing a resistance band barbell comes down to three critical engineering components. Don’t be fooled by flashy colors; pay attention to these elements.
1. Bar Rigidity & Knurling
If a bar is hollow and made of cheap aluminum, it will flex under heavy loads. This flexion absorbs kinetic energy that should be going into your muscles. You want solid steel, or aircraft-grade tubular aluminum. Furthermore, check the knurling (the cross-hatch grip pattern cut into the metal). Passive knurling gets slippery when you sweat. You need aggressive, deep-cut knurling for heavy back days.
2. Bearing Architecture
The spec sheet won’t tell you this, but the difference between a loose-ball bearing and a sealed-cartridge bearing in the bar hooks is massive. Sealed bearings keep chalk, sweat, and skin out of the rotation mechanism. This means you won’t be re-greasing your bar every 6 months. If a company doesn’t explicitly state “sealed bearings,” they are likely using cheap friction washers.
3. Layered vs. Molded Latex
Not all bands are created equal. Molded latex is poured into a tube shape and dries. If it gets a tiny nick, it will snap cleanly in half. Layered latex (used in premium systems) is built by wrapping microscopic sheets of latex over each other dozens of times. If a layered band gets a nick, only the outer layer peels away, keeping you safe. Always look for “continuous layered latex” in the product specs.
❌ Common Mistakes When Buying Variable Resistance Gear
As an industry consultant, I constantly see buyers fall into predictable traps designed by clever marketing departments. Here is how to navigate the noise.
The “Equivalent Weight” Fallacy
Many brands advertise their system as providing “up to 300 lbs of equivalent resistance.” You need to interpret this carefully. Unlike a 300 lb iron barbell, which weighs 300 lbs from the floor to the lockout, a band only reaches that 300 lb peak at its maximum safe stretch (usually around 6 feet of elongation). When you are starting the lift, you might only be lifting 50 lbs.
If you are transitioning from heavy free weights, you must over-index on the band capacity. If your current squat is 225 lbs with iron, do not buy a band system that maxes out at 200 lbs. You need a system that maxes out at 400 lbs to feel adequate tension through the middle of the rep.
Ignoring the Ecosystem
A major mistake is buying a proprietary bar that only accepts one type of custom-clipped band. Once those bands wear out (and all elastic polymers eventually degrade), you are forced to buy expensive replacements directly from that manufacturer. I heavily favor systems that utilize standard, open-hook designs allowing you to source third-party bands once your originals lose their elasticity.
⚖️ The Science: Variable Resistance vs Traditional Free Weights
To truly understand why a resistance band barbell is effective, we have to look at biomechanics and the human strength curve.
According to research in the National Strength and Conditioning Association, human skeletal muscle has a variable strength capacity based on joint angles. Think about a bench press: the hardest part is getting the bar off your chest. Once your arms are halfway up, your mechanical advantage increases, and the weight feels lighter. Lockout is the easiest part.
The Iron Disadvantage:
With a 100 lb iron barbell, the weight is static. Because you are limited by your weakest point (off the chest), your muscles are actually under-stimulated at the top of the lift.
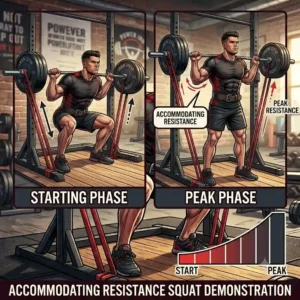
The Variable Advantage:
With variable resistance, the tension increases as your mechanical advantage increases. It might be 50 lbs off the chest, 80 lbs in the middle, and 120 lbs at lockout. This means your chest and triceps are experiencing maximum mechanical tension throughout the entire range of motion. This leads to a massive increase in blood pooling (the “pump”) and superior myofibrillar hypertrophy.
⏳ Long-Term Cost & Maintenance Cycle
Calculating the Total Cost of Ownership (TCO) for a resistance band barbell requires looking beyond the initial purchase price. Here is your “Year One” roadmap and what to expect regarding maintenance.
Months 1-3: The Break-in Period
Your bands will undergo a process called “stress relaxation.” They will permanently stretch out by about 2-5% of their original length. This is normal. You will need to start widening your stance slightly to achieve the exact same tension you felt on day one.
Months 4-8: The Oxidation Battle
Latex degrades when exposed to UV light (the sun) and ozone. If you leave your bands in your garage or near a window, they will become brittle. Insider Tip: Every three months, wipe your bands down with a silicone-based lubricant (never petroleum-based, which melts rubber). This hydrates the latex and prevents dry rot.
Months 9-12: Inspection and Replacement
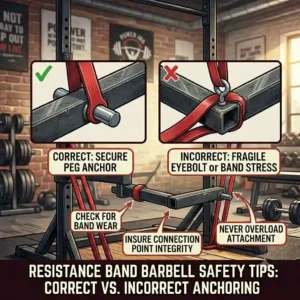
By the end of year one, if you are lifting heavy 4 times a week, your primary bands will have lost about 10-15% of their peak resistance capacity. You should inspect the anchor points for micro-tears.
Comparing this to traditional weights: A set of adjustable dumbbells might cost $400 and last a lifetime with zero maintenance. A premium variable resistance system might cost $200 initially, but you will likely spend $50 every 18 months replacing degraded bands. In my view, the joint preservation and space-saving aspects easily justify the cyclical replacement cost.
✨ Don’t Miss These Exclusive Deals!
🔍 Ready to transform your physique from home? Click on any of the highlighted products above to check current pricing, read more user reviews, and secure your new workout system today!
🏁 Conclusion
Transitioning away from a gym full of heavy iron plates to a streamlined resistance band barbell setup is a paradigm shift. In 2026, the engineering behind these systems has officially bridged the gap between physical therapy tools and genuine muscle-building equipment.
If you are an advanced lifter wanting to push the absolute limits of mechanical tension without destroying your joints, investing in a premium steel system with high-capacity layered latex is the clear path forward. For beginners, road warriors, or those recovering from injuries, the lightweight, highly adaptable bow and platform models offer unparalleled versatility and safety.
Remember, the effectiveness of any fitness tool lies in the consistency of the user and the precision of their form. Respect the polymer break-in periods, anchor your footing properly, and embrace the variable tension curve. Your joints—and your muscle fibers—will thank you.
❓ FAQs
❓ What is the max weight of a resistance band barbell?
✅ High-end systems can provide over 500 lbs of peak tension when using multiple heavy-duty bands simultaneously. However, budget-friendly options typically max out between 150 and 200 lbs of tension. Always check the manufacturer’s load limit for the bar…
❓ Can you build muscle with a resistance band barbell?
✅ Absolutely. Muscle hypertrophy requires mechanical tension, metabolic stress, and progressive overload. Variable resistance provides incredible peak tension at full contraction, effectively stimulating fast-twitch muscle fibers for significant growth and strength gains when used consistently…
❓ How long do the bands last on these systems?
✅ With heavy, regular use (3-4 times a week), high-quality layered latex bands generally last 12 to 24 months. Proper maintenance, like keeping them out of direct sunlight and avoiding sharp edges, significantly extends their lifespan…
❓ Is a resistance band barbell safe for bad joints?
✅ Yes, it is widely considered safer for joints than free weights. Because the load is lightest at the beginning of the movement (where joints are most vulnerable in deep flexion), it dramatically reduces shearing forces on knees, shoulders, and lower back…
❓ What’s the best length for the bar?
✅ The ideal length is between 32 and 36 inches. This width perfectly mimics the standard grip positioning for conventional deadlifts, rows, and shoulder presses, while remaining compact enough for easy storage and travel…
📚 Recommended for You
- 5 Best medium exercise bands for 2026: Expert Field Test & Review
- 5 Best Mini Bands for Glute Activation & Rehab in 2026 (Expert Tested)
- 5 Power-Packed Options: Finding the Best bar for exercise bands in 2026
Disclaimer: This article contains affiliate links. As an Amazon Associate, I earn from qualifying purchases. If you purchase products through these links, we may earn a small commission at no additional cost to you.
✨ Found this helpful? Share it with your friends! 💬🤗